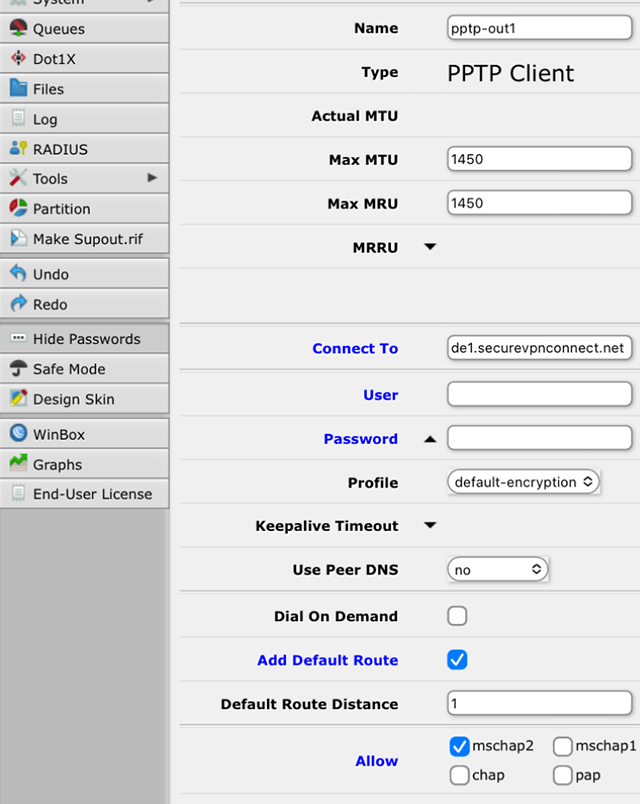
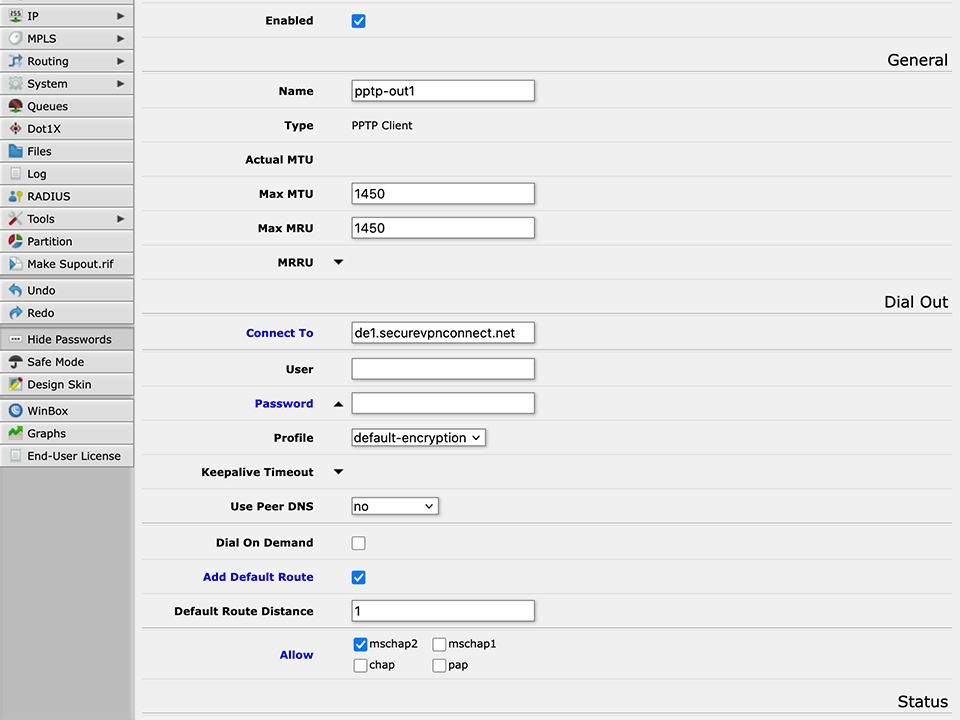
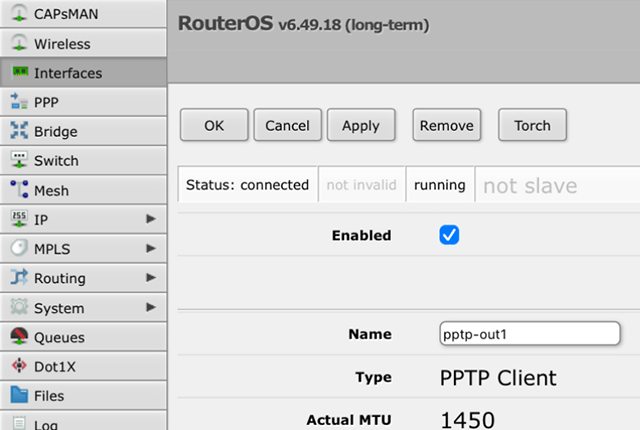
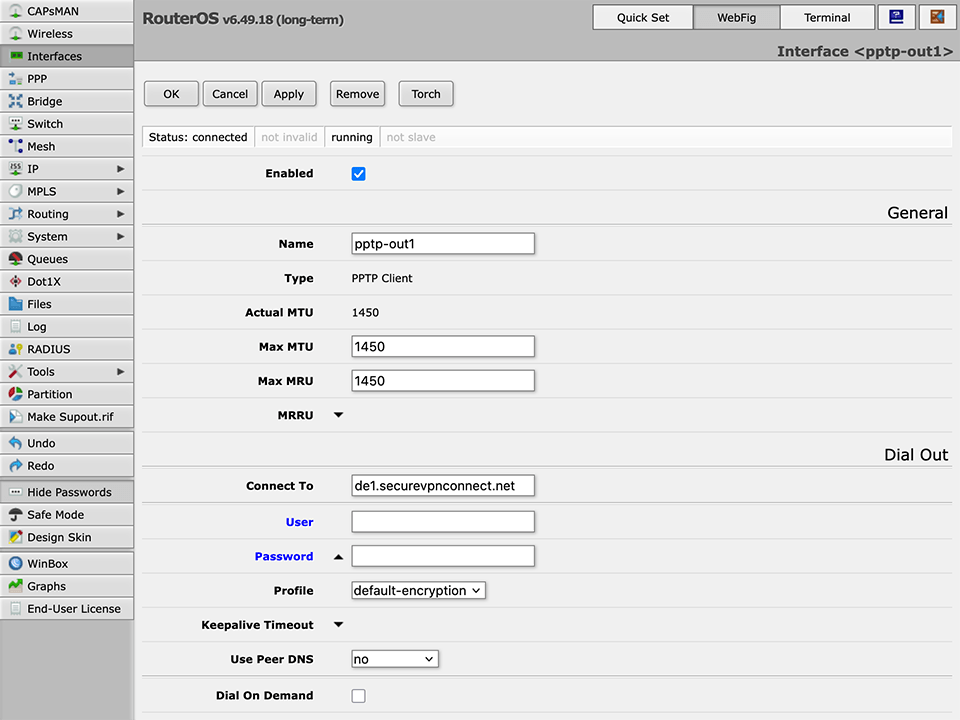
52.14.145.78 - United States, Seattle
Router

Setting up PPTP VPN on MirkoTik

Setting up a VPN connection using the PPTP protocol in the Mikrotik RouterOS is easy.

1
Log in to the router's web interface. The password can be found on the sticker that comes with the router.
Next
Setting up PPTP VPN on RouterOS, step 1 Setting up PPTP VPN on RouterOS, step 1
2
Go to Interfaces, open tab Interface, click on Add new and select PPTP Client.
Next
Setting up PPTP VPN on RouterOS, step 2 Setting up PPTP VPN on RouterOS, step 2
3
Fill in the fields as follows:
  • Connect To - the connection server, the list of servers can be found in readme.txt in the subscription archive
  • User and Password - the login and password of the subscription, can be found in readme.txt in the subscription archive
  • Add Default Route - enable the checkbox
  • Allow - enable only mschap2
Next
Setting up PPTP VPN on RouterOS, step 3 Setting up PPTP VPN on RouterOS, step 3
4
Click Apply and make sure that the status of connection is "connected".
If the connection is not established, check the login and password of the subscription, try to specify a different connection server, or use another protocol (L2TP or OpenVPN).
Next
Setting up PPTP VPN on RouterOS, step 4 Setting up PPTP VPN on RouterOS, step 4
5
Go to IP - Firewall, open NAT tab, click Add New.
Next
Setting up PPTP VPN on RouterOS, step 5 Setting up PPTP VPN on RouterOS, step 5
6
In the Out. Interface field specify the OpenVPN interface created in step 2. Select masquerade in the Action field, then click OK (for convenience, the other options are not shown in the screenshot).
Next
Setting up PPTP VPN on RouterOS, step 6 Setting up PPTP VPN on RouterOS, step 6
7
If your Internet connection type is PPPoE, go to the Interfaces tab and click on the interface line with the PPPoE Client type.
Next
Setting up PPTP VPN on RouterOS, step 7 Setting up PPTP VPN on RouterOS, step 7
8
Set theDefault Route Distance to 10 and click OK.
Next
Setting up PPTP VPN on RouterOS, step 8 Setting up PPTP VPN on RouterOS, step 8
9
If your Internet connection type is IPoE, go to the IP - Routes. At the top of the route list we see two routes with Dst. Address 0.0.0.0/0. The first route for our VPN traffic is inactive, as indicated by the absence of the letter A in the DS string. You also need to make sure that in the Gateway field for this route is specified "reacheble". The second route is standard, and it is active, as indicated by the letter A in the DAS line. In order for our traffic to go through the VPN, we need to lower the priority of the standard route by setting its Distance to 10. To do this, you need to remember the address of the gateway specified in the Gateway. In the screenshot, the gateway address is 192.168.1.1, it may be different for you. Next, click on the Add New button.
Next
Setting up PPTP VPN on RouterOS, step 9 Setting up PPTP VPN on RouterOS, step 9
10
In the Gateway field specify the gateway address from the previous step, in the Distance set 10 and click OK.
Next
Setting up PPTP VPN on RouterOS, step 10 Setting up PPTP VPN on RouterOS, step 10
11
We see that in the route table have two identical routes with different Distance fields. Now delete a route with Distance 1 by clicking on “–” button. Now all traffic goes through the VPN tunnel and this completes the setup.
To top
Setting up PPTP VPN on RouterOS, step 11 Setting up PPTP VPN on RouterOS, step 11

Registration


E-mail
Language
Password
Confirm Password

Support and Feedback